Basically this is a handheld cutter that you move around with your hands, neat enough, I have got one of those myself and use it every now and then, and it is really handy. But the one Ben has got is extremely awesome, because it also has camera controlled CNC capabilities that "auto-corrects" your hand movements! Tool snags on something while you are moving it? Mine would do a wrong cut, and I would have to start over... This one however, just quickly corrects the position of cutter and continues on! Excellent! Have a look at Ben's video:
10.04.2016
Handheld CNC? Awesome!
Ben over at Applied Science (you should check out his channel, he does a lot of cool stuff) has gotten a hold of a handheld CNC machine from Shaper Tools.
09.04.2016
A Falcon is standing around, and all the engineers are cheering!
Wohooo! They did it!
SpaceX landed a Falcon first stage on one of their drone ships successfully. This is great news, and my warmest congratulations to the SpaceX team and Elon Musk for achieving this milestone. They also tweeted this really cool clip from somewhere fairly high up on the rocket, where you can see the "wings" moving to position the rocket and the landing legs extending. Really cool!
I have tweeted a question to SpaceX, and if I do get a reply I will share it with you here. The question was, what happens after the Falcon lands? Is it secured in a vertical position and then transported to land, or is it somehow lowered to a horizontal position for the transport? What tickled my curiosity was that in the topmost video you can clearly see the waves affecting the drone ship after landing, and the Falcon is noticeably tilted by it, so they have to do something before transport. And since it is a drone ship, there is no crew to do stuff, which means that most likely it will be an automated process, which is really interesting!
SpaceX landed a Falcon first stage on one of their drone ships successfully. This is great news, and my warmest congratulations to the SpaceX team and Elon Musk for achieving this milestone. They also tweeted this really cool clip from somewhere fairly high up on the rocket, where you can see the "wings" moving to position the rocket and the landing legs extending. Really cool!
Onboard view of landing in high winds pic.twitter.com/FedRzjYYyQ— SpaceX (@SpaceX) 9. april 2016
I have tweeted a question to SpaceX, and if I do get a reply I will share it with you here. The question was, what happens after the Falcon lands? Is it secured in a vertical position and then transported to land, or is it somehow lowered to a horizontal position for the transport? What tickled my curiosity was that in the topmost video you can clearly see the waves affecting the drone ship after landing, and the Falcon is noticeably tilted by it, so they have to do something before transport. And since it is a drone ship, there is no crew to do stuff, which means that most likely it will be an automated process, which is really interesting!
01.04.2016
DIY 3D-printed wall mounts - part 5
It was a good thing that I went way overboard with regards to length of the clip last time I recorded. This has allowed me to just edit the length of the clip for this week, which is great since I have had a worsening cold since easter and would not have had the time or energy to record anything this week. But here is a clip for you anyway, it is time to start refining the rough designs!
Next week will see some more refining, and after that I believe I will test out some simulation app in Onshape to do some Finite Element Analysis of the wall mount, just for fun!
25.03.2016
A few seconds of fame!
One of the national Norwegian tabloid newspapers, VG, decided to do a piece this easter about the Norwegian "oil crisis", that is to say the effect the massive drop in oil price has had on the oil and gas industry here in Norway. They decided to do interviews with ten affected people. While looking for people to interview, they asked NITO Nord-Rogaland og Sunnhordaland, the local branch of NITO (The Norwegian Society of Engineers and Technologists) that I belong to. Since I did the opening ten minutes of an event they were participating in a few weeks back (see the "Public appearance" post), they named me as a candidate to the journalist. And suddenly, on Monday 21st, I saw this in the newspaper:


And a buddy of mine linked this to me. Both of the pieces are in Norwegian, but the gist of them is that I have been affected by the "oil crisis" by being placed on a forced leave of absence (basically temporarily losing my job and becoming eligible for social support) from Imenco AS, and that in the meantime I have found temporary work as a lecturer at Stord/Haugesund University College. It also delves into the emotional turmoil you experience in such a situation.
So without actually intending it, I ended up with a few seconds of fame while enjoying the ski resort and cross-country skiing opportunities in Hovden, Norway, this easter.
I will be back next with the next part of my 3D-print project.
17.03.2016
DIY 3D-printed wall mounts - part 4

The lid has arrived... I got really carried away with the screen recording this time. Before I knew it, I had made the lid and refined the design of both the lid and the wall mount! And had made a clip clocking in at more than 50 minutes... Luckily, Youtube has a nifty editing tool, so for this part of the project I edited the clip to be only the first 8 minutes, where I create the lid that goes on the wall mount. Enjoy!
11.03.2016
DIY 3D-printed wall mounts - part 3

It is finally here! A screen recording of me trying out Onshape for 3D CAD modelling of the wall mounts I am going to print. As you will see in the clip, I am not used to working in Onshape, I am basically learning as we go along. Had I done this in Inventor (which I have extensive experience with), I would probably have done the recording, then edit out mistakes and put audio on lastly. Since this was a learning experience for me I chose to record both screen and audio at once, so enjoy:
As you can see I did not finish the part. I figured that almost 30 minutes was more than enough in one go (actually I was amazed that I had been recording for that long, because it only felt like it was half that). This of course means that we will have to another session, and I am really looking forward to it.
In part four we will finish off the basic design by doing the cover for the screw head also, and we will refine the end design by rounding edges and making it look more "professional". Also we will have to do something creative with regards to locking the cover for the screw head in place, or else it will just slide right off the bottom wall mount once they are up on the wall.
As you saw in the clip I made the Onshape project public, so you can find it through searching for "Wall mount" in the public projects in Onshape. I have also moved the Swift Calcs calculation into the Onshape project, since that is possible now with the Swift Calcs app in Onshape.
I have also found this Onshape blog post about successful 3D-printing of larger parts (larger than the printer can print in one go) which might come in handy in the future.
I spent (or actually wasted) quite a bit of time in trying to get hold of a good screen recording software that was also cheap (read: free). After trying several open source programs and also a few free trials, I finally stumbled onto the fact that you can actually get such software as Chrome extensions! So I ended up with this one, which seems to do exactly what I need.
06.03.2016
DIY 3D-printed wall mounts - Part 2
I had hoped that part 2 of this project would be the screen-recording of me designing the wall mounts in Onshape. However this has been a hectic week, so regrettably I have not gotten that far yet. So instead I have done more thorough preparations than originally planned. A quick, hand-drawn sketch gives you an idea of what I intend to do in Onshape:

The three views to the top and left are the wall mount itself, the two views that are sectioned off are of a lid to hide the head of the screw.
The sketch is unrefined, edges will have to be rounded and so forth. Also of note is the amount and placement of the "teeth" which I have not decided on yet. And the lid for hiding the screw heads will need some form of resistance, keeping it from sliding directly off the lower wall mount, maybe in the form of an indentation on the wall mount itself that will push on the lid and cause enough friction for it to stay in place (should the design fail in this respect, it will be quickly solved with a little dab of glue...)
I have also selected the screws for the mounts, so I know have the diameter of the hole going through the wall mount, which needs to be 4 mm. The top of the conical part has to have a diameter of at least 7 mm.
As for the other dimension, such as the thickness of 3 mm of the protruding part of the wall mount, is guess work for now, but let us have a look at some quick calculations to check if it should be enough. For this we will use Swift Calcs, the link will take you directly to the worksheet that I have shared there.
Swift Calcs is a new calculation tool, and, like Onshape, it is cloud based, meaning you can do everything from your browser (although at the moment, until the next update of the Chrome browser, it has a reduced calculation speed in that particular browser. This will apparently be corrected in the next Chrome update, due to arrive later this month). Swift Calcs is currently in the beta phase and free to use. I do not know if they have some kind of business plan for when it is ready for proper release, we will just have to see. For now, I think it is an awesome free tool, giving you great flexibility so long as you have an internet connection.
Since they are still deep in the developing stage, I have also suggested adding a "lecture mode", a sort of stripped down, minimalist version of a powerpoint presentation, no fancy animations and stuff, just the worksheet divided into segments, where a certain action (i.e. a mouse-click) will make the next segment visible, while still being able to scroll freely through the segments that have already been made visible. I think this can be a powerful tool, freeing up the person doing the lecture to actually face the students (instead of the whiteboard), gaining eye-contact and more interaction. If they decide to implement something like that I will jump at the chance of using, that is for sure.
That was all for this week, hopefully I will have gotten time to do the screen-recording by next weekend.
27.02.2016
DIY 3D-printed wall mounts - Part 1
(Norsk)
My first post with a self-made video introduction, sorry about the low sound, I will have to speak up for my next one.
As I mentioned in the video, I will be putting up the dimension I have measured here:


The red measure gives the width of the hole, and is: 5 mm at the widest, a bit more than 4 mm at the narrowest.
The blue measure gives the length of the hole, and is 2 mm.
The distance between each hole is about 3.3 mm, and the depth of the teeth on the original tabletop stand is about 1.6 mm.
As I mentioned I intend to do the 3D-modelling in Onshape, which seems to be a good, free tool, at least from the limited experience I have with it up until now. Now I have to find a good screen-capture tool in order to make the video of the CAD process for the next part. If you have a suggestion for me, feel free to comment it, or pm me in any of the social medias you can find me in.
My first post with a self-made video introduction, sorry about the low sound, I will have to speak up for my next one.
As I mentioned in the video, I will be putting up the dimension I have measured here:

The red measure gives the height from the table top, or the wall once it is finished, and is: 27 mm.
The blue gives the distance from the edge and in to the hole, and is: 6 mm.

The red measure gives the width of the hole, and is: 5 mm at the widest, a bit more than 4 mm at the narrowest.
The blue measure gives the length of the hole, and is 2 mm.
The distance between each hole is about 3.3 mm, and the depth of the teeth on the original tabletop stand is about 1.6 mm.
As I mentioned I intend to do the 3D-modelling in Onshape, which seems to be a good, free tool, at least from the limited experience I have with it up until now. Now I have to find a good screen-capture tool in order to make the video of the CAD process for the next part. If you have a suggestion for me, feel free to comment it, or pm me in any of the social medias you can find me in.
24.02.2016
Public appearance
I had the honor of opening an event yesterday. The event was aimed at engineers, technologist and technician that are seeking new work mostly due to the recession in the Norwegian oil business. My slightly more than ten minute talk was about the different phases we go through as we go from being a valued employee with a safe job and are suddenly forced into a leave of absence due to lack of work or are the victims of downsizing. A fairly bleak subject, but as you can see below, OMG Kitty helped me get smiles on most of the faces present.
It says that I am both looking for work (which I am) and that I am a former union representative for NITO (I am technically still a union representative, but since I am on a forced leave of absence from Imenco at the moment, I cannot really contribute with much anyway).
All in all I believe the event was a success, many investments are being made in different fields than Oil & Gas, so there will definitely be a need for us geeks in the future too.
Moglegheitsarena er i gang på Stord Hotell. Arbeidssøkar og tidlegare tillitsvald i NITO, Kjell Eivind Helgesen, opnar konferansen.
Posted by NITO Nord-Rogaland og Sunnhordland on 23. februar 2016
It says that I am both looking for work (which I am) and that I am a former union representative for NITO (I am technically still a union representative, but since I am on a forced leave of absence from Imenco at the moment, I cannot really contribute with much anyway).
All in all I believe the event was a success, many investments are being made in different fields than Oil & Gas, so there will definitely be a need for us geeks in the future too.
21.02.2016
Mars Rover Curiosity: An Inside Account from Curiosity's Chief Engineer
(Norsk)
Right! The last space-related post, at least for a while, is about the book Mars Rover Curiosity: An Inside Account from Curiosity's Chief Engineer, written by Rob Manning and William L. Simon, where Rob Manning is the Chief Engineer from the book title.

This book gives the reader fascinating insights into what is, in essence, amazing engineering. The fact that they have created a remotely controlled vehicle, launched it into space, landed it on another planet and now have it roaming around doing science is incredible. Kudos to all the people that have worked on Curiosity and those that still work on it.
Manning gives us an in-depth tour through the project, From the beginning until the present (or at least the present when the book was written). He highlights many of the problems they struggled with, and recounts how they overcame them, everything from developing a brand new landing system, scratch that, not just a new landing system but a whole new landing concept, to the difficulties in getting the rock sampling system right. The latter involved both the drilling system as well as the sample delivery system, where the sample is brought from the drill and into the rover's sample processing gear (another engineering marvel). As a matter of fact, Destin of Smarter Every Day even did an episode about the Curiosity drill:
If you like technical stuff, like me, this book is absolutely brilliant! If you are more interested in management stuff, the book also covers some of that, so it is still good. Grab it from you local library if that is your wont, or from places like Amazon / Audible if that is more to your fancy, and have an interesting read, I sure did!
As mentioned, this is the last space-related post in a while, my next project will involve me filming a few snippets, both with a camera and screen-capture, as I plan and design a part that a buddy of mine is going to 3D-print for me and that I am going to put to practical use in my home afterwards. Stay tuned!
Right! The last space-related post, at least for a while, is about the book Mars Rover Curiosity: An Inside Account from Curiosity's Chief Engineer, written by Rob Manning and William L. Simon, where Rob Manning is the Chief Engineer from the book title.

Picture borrowed from Amazon.com
This book gives the reader fascinating insights into what is, in essence, amazing engineering. The fact that they have created a remotely controlled vehicle, launched it into space, landed it on another planet and now have it roaming around doing science is incredible. Kudos to all the people that have worked on Curiosity and those that still work on it.
Manning gives us an in-depth tour through the project, From the beginning until the present (or at least the present when the book was written). He highlights many of the problems they struggled with, and recounts how they overcame them, everything from developing a brand new landing system, scratch that, not just a new landing system but a whole new landing concept, to the difficulties in getting the rock sampling system right. The latter involved both the drilling system as well as the sample delivery system, where the sample is brought from the drill and into the rover's sample processing gear (another engineering marvel). As a matter of fact, Destin of Smarter Every Day even did an episode about the Curiosity drill:
If you like technical stuff, like me, this book is absolutely brilliant! If you are more interested in management stuff, the book also covers some of that, so it is still good. Grab it from you local library if that is your wont, or from places like Amazon / Audible if that is more to your fancy, and have an interesting read, I sure did!
As mentioned, this is the last space-related post in a while, my next project will involve me filming a few snippets, both with a camera and screen-capture, as I plan and design a part that a buddy of mine is going to 3D-print for me and that I am going to put to practical use in my home afterwards. Stay tuned!
14.02.2016
The Martian
So, many of you have probably already seen the movie The Martian, featuring Matt Damon as Mark Watney, and even Norwegian Aksel Henie as a German astronaut. The movie is based upon the book by the same name by Andy Weir.
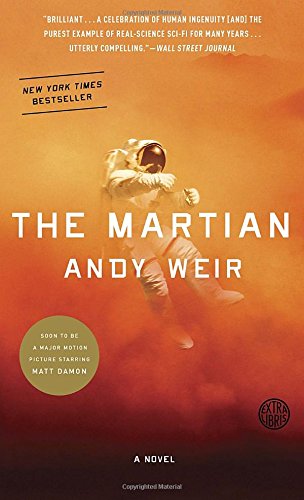
As should be fairly clear from the trailer, and without spoiling too much of the story, Mark Watney is believed dead during an emergency evacuation from Mars due to extreme weather, and subsequently abandoned.
Once the weather has passed, he finds that he is completely alone on the red planet and all communication with Earth is dead. The equipment he is living in is basically only designed to last for their original 30 day mission. He needs to survive until the next mission arrives in a few years, and he has to somehow make his way to the next mission's landing zone. So to quote Watney: "Let's science the shit out of this." And what follows is a story that surpasses even MacGuyver's ingenuity and greatness!
As usual the book is much better than the movie. With that said, I think the movie is great, even though I am no huge Matt Damon fan. The main reason that the book is much better than the movie is that, of course, the movie has had to do compromises and due to play length restrictions and keeping up the narrative they have had to drop cool stuff and alter other cool stuff somewhat in order to make it all fit in a feature length movie. That being said, what they have managed to squeeze into this almost two and a half hour long movie is impressive.
Still, if you see the movie and like it, or have already seen it and liked it, you really, REALLY, should consider reading the book or listening through the audiobook. I did the audiobook myself, before seeing the movie, and heartily recommend both! I will also probably buy the book in the near future, just to get to read it myself, and then keeping it in my sagging bookshelves as another cherished work.
If you have not seen the movie yet, rent or buy it from somewhere like Google Play Movies and enjoy. If you have not read or listened to the book yet, then as usual I recommend your local library, or buy it from somewhere like Amazon/Audible, and enjoy it too.
Next week I am going to write about yet another book, this one also about Mars, more specifically the Curiosity rover, written by its Chief Engineer.
07.02.2016
What is the curious connection between Motörhead and Matt Damon?

"I am the one, Orgasmatron, the outstretched grasping hand
My image is of agony, my servants rape the land
Obsequious and arrogant, clandestine and vain
Two thousand years of misery, of torture in my name
Hypocrisy made paramount, paranoia the law
My name is called religion, sadistic, sacred whore.
I twist the truth, I rule the world, my crown is called deceit
I am the emperor of lies, you grovel at my feet
I rob you and I slaughter you, your downfall is my gain
And still you play the sycophant and revel in you pain
And all my promises are lies, all my love is hate
I am the politician, and I decide your fate
I march before a martyred world, an army for the fight
I speak of great heroic days, of victory and might
I hold a banner drenched in blood, I urge you to be brave
I lead you to your destiny, I lead you to your grave
Your bones will build my palaces, your eyes will stud my crown
For I am MARS, the god of war, and I will cut you down."


Yup, Lemmy is Mars, the god of war. And what was the title of one of Matt Damon's newest movies?

Ah, yes, The Martian, where he is a stranded astronaut on Mars, the planet named after Mars, the god of war. And next week I will write a bit about the movie starring Matt Damon, and the book by Andy Weir that it is based on.
Oh, and by the way, why is the connection between Motörhead and Matt Damon curious?
Because NASA has a certain rover on a certain red planet that is named Curiosity! And in a about two weeks time I intend to write a bit about the cute rover too. In other words, I will continue my space-oriented posts for a few weeks more, I started off with SpaceX and Elon Musk, I'll continue with The Martian and the Curiosity rover.
Mechanical Design 05.02.16
This lecture we talked about weld strength versus fatigue from dynamic loads, and drew a Smith diagram. We calculated an example, and then moved on to the next chapter, looking at threaded connections with a short introduction to threads and thread types.
02.02.2016
Mechanical Design 01.02.16
01.02.2016
Mechanical Design 29.01.16
(Norsk)
This lecture we talked about welds subjected to bending and did the calculations for one example.
This lecture we talked about welds subjected to bending and did the calculations for one example.
30.01.2016
Thermodynamics Chapter One
(Norsk)
Right! In the course UNI2002 Thermodynamics and Fluid Mechanics, where I do the thermodynamics lectures, we are well into chapter two. Chapter one is an introductory chapter, introducing concept such as heat, work and system. We have looked at the different properties and units we will be using the most in this course. We have talked about how to determine the state of the working fluid and what is meant by reversibility. Then we looked at the first law of thermodynamics, conservation of energy and the non-flow and steady-flow equations. My lecture notes from chapter one can be found here.
Right! In the course UNI2002 Thermodynamics and Fluid Mechanics, where I do the thermodynamics lectures, we are well into chapter two. Chapter one is an introductory chapter, introducing concept such as heat, work and system. We have looked at the different properties and units we will be using the most in this course. We have talked about how to determine the state of the working fluid and what is meant by reversibility. Then we looked at the first law of thermodynamics, conservation of energy and the non-flow and steady-flow equations. My lecture notes from chapter one can be found here.
27.01.2016
Elon Musk: Tesla, SpaceX, and the Quest for a Fantastic Future
(Norsk)
Ashlee Vance has written this interesting book about Elon Musk. Now, there are several books about the man and I have not read any of the others, so I am not proclaiming this to be the Elon Musk book. I enjoyed this book however, and maybe it might be because Ashlee also hails from South Africa originally, like Musk. Ashlee is a columnist writing about technology and business also, so he problably knows his way around in the business world pretty well.
As mentioned Musk is from South Africa, but his family is Canadian, so he had ties to the American continent from birth. Although it is difficult to tell without knowing him personally, I feel that the book gives a fair account of his upbringing, a rough one with lots of bullying, his late-teenage move to Canada, and going to University.
Then it all begins! With the startup of the software company Zip2 (eventually sold to Compaq for US$307 million), on to the online financial service and payment company X.com which merged with PayPal (eventually sold to Ebay for US$1.5 billion).
Then a shift from pure software to software and hardware combined (and I mean real hardware, we are talking space rockets here!) in SpaceX, Tesla Motors and SolarCity. The first of which aims to bring the stars to the masses (or more realistically, bring the masses into space), the second aims to shift transportation from fossile fuels to electric and thus help combat global warming, the third aims to bring solar panels to the masses and thus also combat global warming.
In recent years Musk has also been active on other projects, the most known being the Hyperloop which aims to make mass transit faster and more environmentally friendly. Late last year he also announced an OpenAI project, a not-for-profit Artificial Intelligence research project.
All in all, this guy has a lot on his plate! We should be thankful that the world contains people like him, the visionaries that basically kicks progress in the butt and makes it hurry up. If you are interested in this book, I recommend your local library, or if you are willing to pay money for it you can use Amazon or some other bookstore to buy it. If you prefer to listen to your books, grab it from a streaming service like Audible, buy a download or a hardcopy, or maybe you are lucky and can get it from your local library. (PS: Libraries are great!)
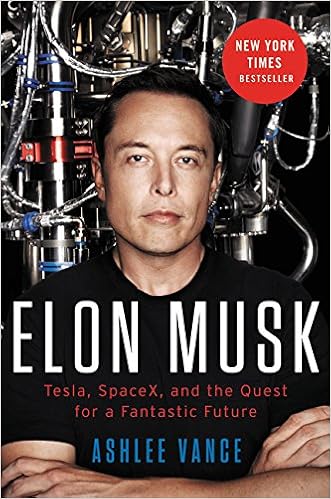 |
| Image from Amazon.com |
As mentioned Musk is from South Africa, but his family is Canadian, so he had ties to the American continent from birth. Although it is difficult to tell without knowing him personally, I feel that the book gives a fair account of his upbringing, a rough one with lots of bullying, his late-teenage move to Canada, and going to University.
Then it all begins! With the startup of the software company Zip2 (eventually sold to Compaq for US$307 million), on to the online financial service and payment company X.com which merged with PayPal (eventually sold to Ebay for US$1.5 billion).
Then a shift from pure software to software and hardware combined (and I mean real hardware, we are talking space rockets here!) in SpaceX, Tesla Motors and SolarCity. The first of which aims to bring the stars to the masses (or more realistically, bring the masses into space), the second aims to shift transportation from fossile fuels to electric and thus help combat global warming, the third aims to bring solar panels to the masses and thus also combat global warming.
In recent years Musk has also been active on other projects, the most known being the Hyperloop which aims to make mass transit faster and more environmentally friendly. Late last year he also announced an OpenAI project, a not-for-profit Artificial Intelligence research project.
All in all, this guy has a lot on his plate! We should be thankful that the world contains people like him, the visionaries that basically kicks progress in the butt and makes it hurry up. If you are interested in this book, I recommend your local library, or if you are willing to pay money for it you can use Amazon or some other bookstore to buy it. If you prefer to listen to your books, grab it from a streaming service like Audible, buy a download or a hardcopy, or maybe you are lucky and can get it from your local library. (PS: Libraries are great!)
Mechanical Design 25.01.16
(Norsk)
This lecture we continued on fillet welds and calculated a few more examples. Since we did not cover any new subjects this lecture, there is no new recommended problems.
This lecture we continued on fillet welds and calculated a few more examples. Since we did not cover any new subjects this lecture, there is no new recommended problems.
23.01.2016
Mechanical Design 22.01.16
(Norsk)
Another lecture done yesterday, we talked about welds and did some calculations on fillet welds.
Another lecture done yesterday, we talked about welds and did some calculations on fillet welds.
20.01.2016
SpaceX Falcon 9 rocket - successful landing on droneship, not so successful leg function...
(Norsk)
This Sunday (January 17th) SpaceX launched one of their Falcon 9 rockets, on a mission to place the Jason-3 satellite into low earth orbit. Let's look a bit at the company, the rocket and at the satellite before we take a look at the mission itself:
The company was founded by Elon Musk in 2002. (Yup, the same dude that is responsible for the awesome Tesla invasion we are experiencing here in Norway. He has got other achievements under his belt also, but I will get back to him at a later date, since I want to write about a biography of his that I have read.) Their goal is to make space technology more available and ultimately contributing to the colonization of other planets. Read more here.
Now that is REALLY cool! But this time around they could not land the first stage on land, but had to use their "Just read the instructions"-droneship. Basically a remotely controlled rocket landing pad at sea! Read more about the droneship here. Just the idea sounds totally crazy, but Elon gave a short explanation of why this had to be in two tweets:
This Sunday (January 17th) SpaceX launched one of their Falcon 9 rockets, on a mission to place the Jason-3 satellite into low earth orbit. Let's look a bit at the company, the rocket and at the satellite before we take a look at the mission itself:
SpaceX:
| Logo (actually from Wikipedia) |
Falcon 9:
 |
| Image from Wikipedia |
The Falcon 9 is a two-stage rocket. The first stage has nine engines, which gives it enough redundancy to safely complete its mission even if one of the engines should fail and shutdown. In 2012 the Falcon 9 made history by allowing the first ever commercial company to visit the International Space Station. The original goal for the rocket is for it to deliver humans into space (with the Dragon spacecraft). And last I checked, NASA has awarded a contract to SpaceX towards the purpose of delivery of astronauts to the ISS. Basically a "show-us-you-can-do-it" contract, including at least one crewed space flight (with at least one NASA astronaut on board), maneuvering in orbit and docking to the space station, all the while verifying their capabilities. Read more about the Falcon 9 here and the NASA contract here.
Jason-3:
 |
| Image from NASA |
The goal of this satellite is to make highly detailed measurements of sea-level on Earth. This will allow scientists to gain insights into the circulation in the oceans and changes in climate. Read more about it here.
The mission!
Right, so, the Falcon 9 was to launch from Vandenberg Air Force Base and deploy the Jason-3 satellite into low earth orbit. That was the main mission. And it was successful! But... Let's face it, considering ALL of the satellites that have been launched into space, this was not exactly something to brag about. However, SpaceX had an additional mission for the Falcon 9, or, at least for the first stage of the Falcon 9. They were going to try to recover it, instead of letting it crash into the ocean somewhere as is usually done.
A few days before Christmas 2015, SpaceX launched another Falcon 9 rocket from Cape Canaveral Air Force Station, and then proceeded to LAND the first stage afterwards. Take a look in the clip below:
 |
| Image from SpaceX |
If speed at stage separation > ~6000 km/hr. With a ship, no need to zero out lateral velocity, so can stage at up to ~9000 km/h.
— Elon Musk (@elonmusk) 17. januar 2016
So basically, placing satellites into low orbit requires huge velocities, and if the velocity is more than 6000 km/hr when the first stage separates from the second stage, then it is going too fast to be able to land on land, but can still land on a ship. But, anyone that has ever read about or maybe seen a documentary or fairly realistic movie of a hangar ship should know that landing on a moving ship is really difficult compared to landing on a land-based area. So this means that the landing this Sunday would be much more difficult than the one before Christmas, since it had both a higher start velocity and a moving landing pad. If the twitter reports were correct there was about four meters of waves too, just to make things interesting.
So onwards to the landing this Sunday! The rocket actually nailed the landing itself! Incredible! But then the SpaceX team experienced an RUD... A Rapid Unscheduled Disassembly... In one other word:
 |
| Thanks to Vadich at Deviant Art for this illustration |
The landing went well, but it looks like one of the landing legs gave, toppling the rocket (Note to self: DO NOT topple space rockets, they are not built for that kind of use...) making it explode. You can watch it in the clip below:
Personally, I think they are being a bit unfair in writing "attempted landing". You can clearly see that the landing itself was a success, and that the leg gives out when the thruster stops, in other words once it has to hold the entire weight of the rocket up. So there was an equipment failure directly after the landing.
But anyways, the SpaceX team will get huge amounts of "lessons-learned" from this mission, greatly increasing chances that the next one will be even better. And, let's face it, at least they have learned something from this, as opposed to the alternative where they just let it crash land in the ocean, never to be seen again.
Some of you might ask: Why? Why are they landing the first stage? Because building a rocket is not exactly cheap, although SpaceX has managed to build them alot cheaper than what has been done in the past already. Their aim is to make them even cheaper, because only when it gets cheap enough will we see widespread human activity in actual space. By landing the first stage successfully, they can refurbish it instead of building it from scratch, saving costs and making the next rocket cheaper. So even though they might fail in recovering the first stage from time to time, it is still waaaaay better than not even trying to recover it.
Next week, I will write about the Musk biography I mentioned at the top of the post, it is a good book, so I hope you will read my recommendation of it :)
19.01.2016
First lecture in Mechanical Design
Yesterday I held my first lecture in Mechanical Design. We talked about designing in general, strength calculations, safety factors and did an example calculation. I also got time to introduce the next chapter we will be working on, which is welded connections. We will continue with those on Friday this week.
The lecture notes can be found here (in Norwegian). And the recommended problems can be found here (in Norwegian).
I have also held a few lectures in Thermodynamics, but I will be "saving up" lecture notes there until I can post complete chapters.
The lecture notes can be found here (in Norwegian). And the recommended problems can be found here (in Norwegian).
I have also held a few lectures in Thermodynamics, but I will be "saving up" lecture notes there until I can post complete chapters.
17.01.2016
New layout!
Right... Initially this was going to be an all Norwegian blog. But since I have a lot of English speaking contacts, and now I have a whole class of Nigerian students, I figured it was time to re-think the whole blog.
So... From now on the primary language is English, with Norwegian translations linked with (Norsk) at the top of the post. And a new layout. With all the lecture stuff I will be posting along with everything else, I figured it would be rather messy to keep the "KVEST!" system I originally had. So I have re-vamped the pages into the following layout:
About - where you can read about the name "Kvesting" and about myself, as well as find links to me on social media.
Science & Engineering - where I will try to place all of my sciency geeking, except that which is directly tied to the next category.
Education - where I will place everything connected to me being a teacher, as well as any courses (online or in the flesh) that I undertake.
Books - where I will recommend books I have read or heard, and any other literature related stuff.
DIY - where I will post all of my DIY projects.
Other geekiness - where everything else ends up: health, training, kids, nature etc.
So... From now on the primary language is English, with Norwegian translations linked with (Norsk) at the top of the post. And a new layout. With all the lecture stuff I will be posting along with everything else, I figured it would be rather messy to keep the "KVEST!" system I originally had. So I have re-vamped the pages into the following layout:
Top navigation bar:
Home - where the blog post are located, and anything substantial that is added will have its own blog post.About - where you can read about the name "Kvesting" and about myself, as well as find links to me on social media.
Science & Engineering - where I will try to place all of my sciency geeking, except that which is directly tied to the next category.
Education - where I will place everything connected to me being a teacher, as well as any courses (online or in the flesh) that I undertake.
Books - where I will recommend books I have read or heard, and any other literature related stuff.
DIY - where I will post all of my DIY projects.
Other geekiness - where everything else ends up: health, training, kids, nature etc.
Right hand side:
Here you can subscribe to the RSS and/or mail feed. You can follow me on Google+ and read my tweets. And at the bottom you have the tags and blog archive.
06.01.2016
Rust - The Longest War

(image from Amazon.com)
Jonathan Waldman has written a book called 'Rust - The Longest War', and not surprisingly, it is about corrosion. But not from a purely professional, materials science perspective. Waldman is more of a journalist than a writer of professional literature, and it shows in the way he promotes the more human aspects in the book. The people he writes about are presented well and often with several background stories.
Am amusing thin, red line he has managed to weave through the entire book, is short comments every now and again about the mustaches of some of the men he writes about. This is something he also makes a point of on his web page, where it is written at the bottom: {Made while sporting a mustache}.
In addition he manages to make a subject that can sound really dull, to become quite interesting. After having read the book, you will not have gained any professional knowledge to use in your work, but you will have a good insight into into how big a part of our lives are affected by corrosion, and that it actually is possible to combat it.
04.01.2016
Suspension
(Norsk)
Destin, from one of my Youtube-channel favourites, Smarter Every Day, has recently uploaded a new clip which you can see at the bottom of this post. Amongst other things it show a suspension system works. One of the simplest and most commonplace examples of using a spring suspension system is a standard ballpoint pen. In my case, it is my trusty pen from NITO (the Norwegian Society of Engineers and Technologists):
Destin, from one of my Youtube-channel favourites, Smarter Every Day, has recently uploaded a new clip which you can see at the bottom of this post. Amongst other things it show a suspension system works. One of the simplest and most commonplace examples of using a spring suspension system is a standard ballpoint pen. In my case, it is my trusty pen from NITO (the Norwegian Society of Engineers and Technologists):

When you push a spring together, you notice that that the resistance grows greater. This is because the force needed comes from this expression: F = cx. Here c is a constant for this specific spring, depending on the shape and material of the specific spring. As shown below x is the distance the end of the spring has moved compared to the initial position.

So, the more you compress the spring, the larger x becomes, and the larger the needed force also becomes. The same happens in a cylinder where you push the piston inwards. Here the force needed comes from the expression: F = pA, where p is the pressure and A is the area of the piston head. When the volume on the inside decreases, the pressure increases, and so also does the force necessary to push the piston further.
But, as Destin and the guys from NASA show in the clip below, a way to avoid that increase in resistance, is to use a cylinder with vacuum instead. The vacuum remains constant, even though the volume increases as you pull the piston outwards, and thus the resistance remains the same. Brilliant!
01.01.2016
Headboard
(Norsk)
A little over a year after the redecorating of our bedroom, my better half and I have finally made a headboard for our bed. Originally planned made right after the bedroom was finished, the usually stuff cropped up that needed doing first and time slipped away. Since the headboard was planned we had bought an extra length of curtain, so that we could upholster the headboard in the same fabric. My father also had a chipboard spare after they expanded their kitchen this summer, so he donated that. In addition we needed 11 buttons and a foam mattress.
A little over a year after the redecorating of our bedroom, my better half and I have finally made a headboard for our bed. Originally planned made right after the bedroom was finished, the usually stuff cropped up that needed doing first and time slipped away. Since the headboard was planned we had bought an extra length of curtain, so that we could upholster the headboard in the same fabric. My father also had a chipboard spare after they expanded their kitchen this summer, so he donated that. In addition we needed 11 buttons and a foam mattress.
The chipboard was sawn and drilled according to the drawing beneath. The bed is 180 cm wide, that became the width of the headboard too. By using height equal to halv the width, it became very easy to make the hole pattern. The holes were originally just Ø 8 mm, but it proved too difficult to hit such a tiny hole with a needle after first pushing it through 9 cm of foam mattress. So the holes were widened to Ø 22 mm (they could easy be a different size, but a 22 mm drill bit was incidentally the first one I found amongst my tools). I have not bothered with tolerances in this drawing. The chipboard was sawn with a hand circular saw, by pencil lines I had made using a yardstick and a straightedge, and the center marks for the holes were made in the same way.

In the picture beneath the chipboard is up against the wall, before all the holes were expanded to Ø 22 mm. In the picture, only the holes in the two upper corners are that big. These two holes are meant to hang the headboard onto the wall with two woodscrews. A small tip here will be to place the chipboard onto the appropriate place on the wall and mount the two woodscrews before assembling the headboard further. Then when the headboard is done, it can be placed on the wall quickly and easily.

In hindsight, it might have been better to let the chipboard be 170x80 cm by shrinking it 5 cm on both sides and the top and bottom. Then the foam mattress would protrude 5 cm outside the chipboard i every direction, which would probably have let the edges look even nicer than they do in the end result here. However it would then be necessary to have som spray glue handy, in order to glue the plate to the foam mattress. The glue was not necessary for us here, it was enough with the 11 buttons.
The curtain was placed on the floor on some protective covering (that is to say two exercise mats...)

The foam mattress, a standard 90 x 200 x 9 cm, was cut from 200 cm to 180 cm length. Then it and the chipboard were placed on top of the curtain. The curtain was folded over the edges and stapled to the chipboard. Do not save on staples here. When I worked as a furniture salesman for Bohus Jæren I got to help our warranty guy in re-upholstering a few different furnitures and experienced first-hand that placed the staples close to each other is quite positive.

Then we flipped the headboard up. While standing behind it I showed a knitting needle through a hole and the foam mattress so that it poked at the curtain fabric. My better half was ready on the other side with a button, a strong needle and quadruple thread (we used thread for button holes, since it is supposed to be really strong). By quadruple I mean that a double thread was threaded through the button, then both ends of the thread was threaded through the needle in order to avoid having knot (and weak point) on the button. The needle was pushed though the fabric where the knitting needle was, then both needle and thread was pushed through the foam mattres and out through the hole, where I pulled the needle through and held onto the thread. Then I pulled on the thread while my better half pushed the button into the headboard, and again I used the staple gun, stapling the thread to the chipboard in a back-and-forth pattern.

As I was stapling the tenth button, the thread on the ninth button snapped, shooting the button away from the headboard. Button number nine and eleven therefore got a double quadruple thread (that is to say that a quadruple thread was threaded through the button, making it double quadruple through the needle and the headboard) just in case. This will also be the method of repair should the threads on any of the other buttons snap (hopefully not in the middle of the night...).
The finished headboard was hung on the wall above the bed. The plan was to place a double spotlight in the middle, right above the headboard with the cord hidden behind the headboard, but the dimmer buttons ended up too far away to reach without sitting up in bed. Instead we put up two single spotlights, one above each nightstand.

Abonner på:
Innlegg (Atom)