(Norsk)
My oldest daughter wanted to make something with me to give to their grandparents for Christmas. My mother-in-law had a bird feeder on her wish list. Since we did not have much proper materials for a standard bird feeder, we chose to use this piece of wood instead:
Firstly we had to do some chainsaw work. The girls assisted by sweeping the dust.
The middle piece was measured to fit the drill bit I had available.
Then the drilling commenced. The girls assisted again, this time they helped to hold fast the work piece between my knees as I drilled.
Time for the hand saw. Again the girls helped with holding fast the work piece, and sweeping up the dust.
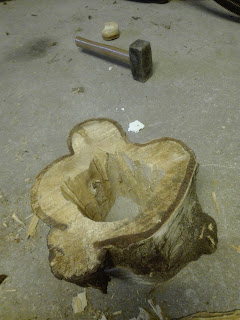
After the sawing, the girls got to pull the "innards" out of the work piece. In the background is work piece number two, since we of course needed to make two editions, one for my parents and one for my mother-in-law. Then it was chisel time!
After smoothing the edges roughly (here the girls got to try out the sledge, at least until I began fearing for my fingers...) and then it was drilling time again. This time with a hole saw. According to different recipes for making nesting boxes, the opening should be between 30 mm and 50 mm in diameter to allow the smallest birds access. Since I had a 55 mm hole saw handy, the entrances became a bit bigger than intended. Again the girls helped and got a real kick out of the disc cuttings the hole saw made.
With one entrance on each side, it was time to decide top and bottom. The top got another, thinner hole, large enough to accomodate the hemp rope I had ready. Here the girls helped threading the rope through the hole.
After having dried indoors for well over a week, it was time to glue the lids onto the sides. The girls helped squeeze out the glue.
The finished result was pretty cool, and since the entrances are fairly big, filling bird seeds and cleaning out should be easy.
My oldest daughter wanted to make something with me to give to their grandparents for Christmas. My mother-in-law had a bird feeder on her wish list. Since we did not have much proper materials for a standard bird feeder, we chose to use this piece of wood instead:


